inside Alan's cluttered head
Archive for February, 2014
Pogo Plug v4 + Flashback
1
10 years
A timely discovery
I have been interested in automated backups of computer data since the mid 90’s, when I had a very well-timed hard disk failure. By pure chance, I had been working on a script that would copy my “important files” from my hard disk to a 100MB “Zip Drive”. I finished my script after testing it several times, and then I went to bed. The next morning, I woke up to find that my hard disk had crashed. Fortunately, I had a very recent backup!
I have often marveled at how easy it would be to lose invaluable files in a single mishap… countless memories, photos, financial records and project work. Backups are important.
BackupPC
When I worked at “the oven place” (TMIO), I was tasked with evaluating backup schemes for their factory and office PC’s. So I looked at several open source packages, with emphasis on being server-centric and automatic. That is, the backup server would decide when to make the backups, and the employees would never have to remember to do anything special. Any process that relies on a human to remember to kick it off is destined to be run once-a-year.
We ended up choosing “BackupPC“, which runs on a modest server with a large storage disk. It would wake up every so often and run through its list of clients and pick one to back up.
For several years, I ran BackupPC at home, too. At first, I ran it on a discarded PC. But later, I migrated to low-power fanless embedded boards.
Flashback
In 2013, I decided that BackupPC was taking too long to make backups. I would bring my laptop home from work and turn it on, and BackupPC would notice it and start backing it up. But the backups were taking so long that they would still be running when I was ready to leave for work the next morning! I ran a few tests with rsync to see if the problem was with BackupPC or the file compression or their crazy idea of how “incremental backups” should work. So I wrote what started out to be a speed test, and then a wrapper around “rsback”, and finally a very minimal python script that I named “Flashback“. “Flash” because it’s fast. My laptop backup, which was taking all night using BackupPC, usually completes in a half hour or less.
You can find Flashback on github.
The Pogo Plug v4
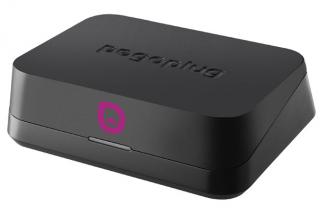 This week, I tried out a new hardware gadget called a Pogo Plug. It is a very close cousin to the SheevaPlug, an embedded Linux board which I had been BackupPC and Flashback on. What caught my attention about the Pogo Plug v4 was:
- It has two USB3 ports.
- It has gigabit ethernet.
- It was on sale for just $20.
The only bad part is that it only has 128MB of RAM… that’s only a quarter of what the SheevaPlug has. But I am not really using the memory for anything. I am just running rsync.
I did not spend any time using the stock firmware. Instead, I immediate enabled SSH and then followed these instructions for installing Arch Linux on a USB stick, which I plugged into the top plug (the bootable USB2 one). I plugged the 1-terabyte USB2 hard disk into the back of the Pogo Plug.
Then I installed Flashback and I modified the monitor script to take advantage of the three-color LED on the front (green for sleeping, yellow for backing up, red for error).
It’s been running for about a week now, and I think it has proven itself worthy.
I’d like to try it with a USB3 hard disk, and see if it’s any faster.
IPv6 + SSL
0
10 years
by alan
in geeky stuff on 2014-02-23
My entire web site, including this blog, now supports IPv6 and SSL/HTTPS.
| protocol | Normal HTTP | Encrypted HTTPS |
| IPv4 | http://ipv4.alanporter.com/ | https://ipv4.alanporter.com/ |
| IPv6 | http://ipv6.alanporter.com/ | https://ipv6.alanporter.com/ |
You don’t have to include the ipv4 or ipv6 prefix… that’s just to force it to use one or the other. The main “alanporter.com” URL works just fine. If your computer has an IPv6 address, your browser should use IPv6. If not, it will fall back to IPv4.
If you’re interested in knowing which IP stack you are using, I recommend IPvFox and IPvFoo browser plug-ins. They show a red “4” or a green “6” in the browser address bar so you’ll know which IP stack you are using.
Some portions of this web site, like the photo gallery and this blog do not have IPv4-specific and IPv6-specific addresses. But just like the main URL, selecting a protocol stack should be automatic.
You might wonder why you get a warning when loading the pages with SSL/HTTPS. I did not send my web site certificates off to Thawte or GoDaddy or Verisign to be signed… I am too cheap for that. Instead, I signed them using my own certificate authority. If you import this CA certificate into your browser, all of my site’s certificates will be considered valid.
If you are security-minded, and you do decide to import my CA certificate, you’ll probably want to make sure that the SHA1 fingerprint is correct.
It should be AD:30:DA:F8:EA:03:A9:D5:E4:33:F4:30:F6:9C:FC:91:8A:D0:6B:06.
IPv6 at home
0
10 years
by alan
in geeky stuff on 2014-02-15
History
I’ve been running an IPv6 tunnel at home since 2010. Why? Several reasons. I’d like to use IPv6 enough that I feel comfortable with it. I’d also like to encourage service providers and web sites to start incorporating it, rather than playing funny games to extend IPv4. And finally, I am convinced that pretty soon, there will be desirable services on the web that are only available on IPv6… so far I have not heard of a killer app that is not accessible on IPv4, but it will come.
For all of this time, I have been running a tunnel from my home router to Hurricane Electric, a leading provider of IPv6 services. They use a system called “6in4”, which bundles up your IPv6 packets inside IP packets of type “protocol 41”. Most folks are familiar with TCP (6), UDP (17), ICMP (1), or maybe even SCTP (132). Well there are a lot of other types of IP packets, and protocol 41 is used to bundle IPv6 traffic inside of IPv4 packets.
The thing is, to get a 6in4 tunnel to work, you have to tell your router to allow IP protocol 41 packets through. Most routers do not do this by default.
Outage
This weekend, we had an internet outage at home. So I rigged up my router at home to connect to the internet through my neighbor’s wifi instead of through our DSL modem (this is pretty easy to do with an old WRT54G router, re-flashed with “dd-wrt” firmware). The problem is that I don’t really have any control over my neighbor’s router, and it does not pass these protocol 41 packets through. So my IPv6 quit working.
That, by itself, would not be so bad. The traditional IPv4 network still works OK. But since my home network DOES have IPv6, my web browser expects to be able to make IPv6 connections. So when I go to a web site like google.com, my browser first tries an IPv6 connection to Google. After several seconds, that attempt times out and then the browser tries an IPv4 connection. Multiply by every HTTP request, and it starts feeling dreadfully slow.
If you’re curious whether your normal browser is using IPv4 or IPv6, there is a cool browser plugin for Firefox called “IPvFox”, and one for Chrome called “IPvFoo”, that will show a “4” or “6” in the address bar. Sometimes, it will show a combination, if the web page content is coming from a mixture of sources.
I wanted to see if there was a way to get IPv6 to my home network, even when I am sitting behind my neighbor’s router.
Gogo6 / Freenet6
I dug around a little, and I found that there are other tunnel brokers that use different schemes of encoding their IPv6 packets and ferrying them to their point of presence. I found one called “Freenet6” that uses a scheme called TSP (on a TCP/IPv4 socket) to get things up and running, and then it encapsulates the IPv6 packets inside UDP/IPv4 packets. This means you can use Freenet6 when you are behind a more restrictive router like your neighbor’s, or at a hotel or a conference).
Freenet6 was not too hard to set up, but it was confusing and a bit annoying.
First, TSP needs a software client on your router. You can download one client from the Freenet6 web site. But I dislike running someone else’s client software as root on my systems. So instead I used the open source “gogoc” that is packaged for Debian.
Second, when you first connect, it might complain about keys, because you’re connecting to “authenticated.freenet6.net”, but you end up talking to “montreal.freenet6.net”. You can get around that my setting CHECK_KEYFILE=”no” in /etc/default/gogoc. I’ll want to revisit this later after things are up and running.
Third, I had a hard time authenticating. After trying many things, I discovered that there are TWO unrelated usernames and passwords that you’ll need.
- The first username/password is for the gogo6 web site. Your username there will be your email address. This is only used for the web site and forums.
- The second username/password is actually used by the gogoc client. To get this, you have to sign up for a Freenet6 Pro account. This account is free, but you have to send an endorsement on Twitter to get it… and this is done in the most annoying way. You click on “Pay with a Tweet or Facebook”, which takes you to a site called paywithapost.de. It wants you to grant access to their Twitter app called “Pay with a Tweet Social Payments”. That’s right… not only do you have to tweet, but you have to install a Twitter app that has access to your account. I used a special “shill” account that I have for just this sort of thing, and then I immediately revoked access to that app.
So, configuration and annoyances behind us, I was able to run the open source “gogoc” client, and it assigned an IPv6 address to my router (which advertised it to the other computers in my house), and now my entire home network has IPv6 access again.
I am looking forward to trying Freenet6, and seeing how it compares to the Hurricane Electric tunnel that I am used to.
I’d also like to shout out to my neighbor, who was nice enough to let us mooch off of his internet service until AT&T gets their act together.